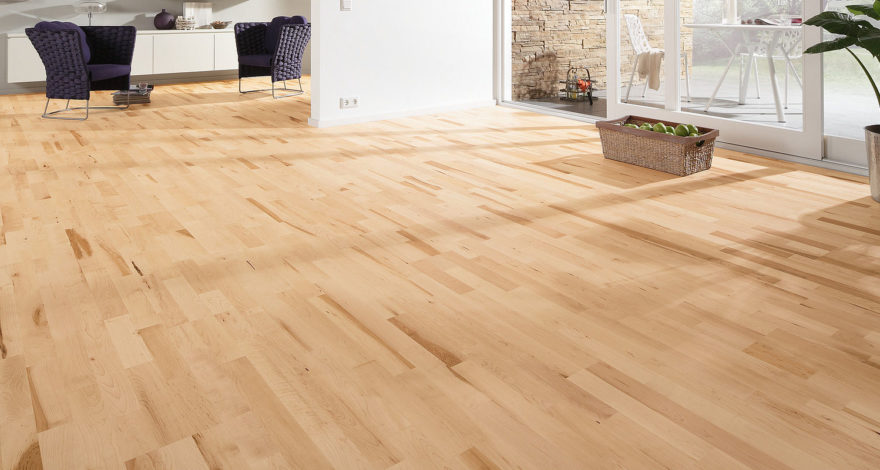
Hardwood floors bring a timeless charm and warmth to any home. But over time, daily wear and tear can take its toll, leaving them dull and scratched. You need to sand the floors often to remove signs of scratches, dents, etc.
However, traditional residential floor sanding Melbourne methods comes with a significant drawback: dust. Wood dust can cause issues in breathing and worsen allergies. Nowadays, homeowners prefer residential dustless floor sanding as it delivers the same efficient results without any mess.
In our guide, we will discuss dustless floor sanding, its benefits over traditional methods, and the step-by-step process to achieve shining floors for your home.
What is Dustless Floor Sanding?
Dustless wood floor sanding is an innovative way to refinish old wooden floors. It works by gently removing the top layer of wood to remove scratches and other damage.
This method uses special sanding machines with vacuum systems to suck up dust as they work. Unlike regular sanding, dustless sanding produces much less dust, making it better for the environment and your health.
Benefits Over Traditional Sanding Methods
The advantages of opting for dustless floor sanding over traditional methods are numerous and compelling. Here are some of the most common advantages:
Healthier Indoor Environment: Dustless wood floor sanding lowers the risk of breathing in wood dust, reducing the chance of respiratory issues, allergies, and other health problems.
Cleaner Work Area: Dustless sanding keeps the space much cleaner, saving time on post-project cleanup and preventing damage to surrounding surfaces from dust buildup.
Improved Air Quality: Dustless sanding improves indoor air quality during refinishing, making it more comfortable for homeowners and workers.
Better Results: Without dust during sanding, visibility and precision are improved, resulting in a smoother and more even finish.
Environmentally Friendly: Dustless floor sanding minimises dust and debris, making it a more eco-friendly option for indoor and outdoor environments.
Preparation Steps
Preparing the Workspace
Before beginning the dustless sanding process, it’s imperative to prepare the area properly. This involves removing all furniture, rugs, and detachable items from the room to ensure unrestricted access to the flooring.
Windows, vents, and doorways should be sealed with plastic sheeting to further contain any dust that may escape the vacuum system. Personal protective equipment such as dust masks, goggles, and ear protection should be worn to safeguard against any dust exposure and noise.
Gathering Tools and Equipment
To achieve the best results from dustless floor sanding, it’s essential to have the right tools and equipment on hand. Here is a list of tools you must collect:
- A dustless floor sander, which you can rent out from home improvement stores.
- Sanding discs with varying grits to progress from coarse to fine sanding stages.
- A dustless orbital sander or buffer to reach into edges and corners.
- A vacuum with a HEPA filter to capture the most dust.
- Tack or microfiber cloths for final cleanups.
- Wood filler to address any gaps or imperfections in the flooring before sanding.
Choosing the Right Grit Sandpaper
Selecting the appropriate sandpaper grit is crucial for effectively sanding your floor without causing damage. Start with a coarser grit if your floor has significant wear or deep scratches; this might be a 16, 24, or 36 grit.
If the floor is in relatively good condition, beginning with a medium grit, like 60 or 80, may be appropriate. It’s important to progressively move to finer grits throughout the sanding process to gradually smooth the floor’s surface and achieve a uniform finish.
The correct progression of sandpaper ensures the removal of imperfections while avoiding excessive wear on the wood.
Step-by-Step Dustless Floor Sanding Process
- Attaching the Sanding Disc to the Dustless Sander
To start the dustless floor sanding process, first select the appropriate grit of sandpaper based on your floor’s condition. For significantly worn floors, begin with a coarser grit, such as 16, 24, or 36. If your floor has only minor imperfections, start with medium grit, like 60 or 80.
Attach the sanding disc to the dustless sander, usually featuring a hook-and-loop system for easy attachment. Ensure the sanding disc is properly aligned with the sander’s backing pad and secured in place. This step is crucial for an effective and uniform sanding process.
- Connecting the Vacuum Cleaner to the Dustless Sander
The next step is to connect a vacuum cleaner to the dustless sander to capture dust and debris efficiently. Most dustless sanders have a vacuum hose adapter that accommodates different vacuum cleaner hoses. Attach the hose to the sander’s dust port securely to ensure no dust escapes during the sanding process.
Turn on the vacuum before you begin sanding to initiate dust extraction immediately, maintaining a clean and health-conscious working environment.
- Sanding the Floor
Begin sanding at one corner of the room, progressing towards the opposite end in a manner that moves along with the wood grain. Apply consistent pressure on the sander and avoid tilting or pressing down too hard to prevent gouges or uneven surfaces. Ensure the sander is in motion at all times when in contact with the floor.
Overlap each pass slightly to ensure complete coverage. Regularly check your progress and adjust your technique as necessary to achieve a smooth and even finish. Remember to switch to finer grit sandpapers gradually, moving through the grit progression to achieve the desired smoothness.
Final Steps for a Flawless Finish
Sanding Edges and Corners
After the main area of the floor is sanded, focus on the edges and corners using an edge sander or a smaller handheld orbital sander.
Continue following the same progression of grits as with the main floor area. Exercise caution to prevent damage to baseboards and walls. This meticulous approach ensures a uniform finish throughout the entire floor.
Repeating the Sanding Process with Finer-Grit Sandpaper
Upon completing the initial sanding with a coarser grit, proceed with finer grit sandpapers to refine the floor’s surface. This step is essential for achieving a smooth and even finish, ready for the final touches.
Remove the previous sanding disc and attach the next finer grit; continue this method until reaching the smoothness level desired for your floor. The final grit often used ranges up to 120 or 150, depending on the wood type.
Vacuuming the Floor and Inspecting for Imperfections
After sanding is complete, thoroughly vacuum the floor to remove residual dust and inspect for imperfections. Use a soft brush attachment on your vacuum to lift all dust, especially focusing on corners, edges, and gaps. If there are any overlooked areas or inconsistencies, sand immediately with the appropriate sandpaper grit.
The aim is to have a completely smooth and uniform surface before proceeding to apply the finish, thereby enhancing your floor’s natural beauty and durability.
Applying the Finish
Choosing the appropriate finish for your hardwood floor is paramount. There are several options available, including water-based polyurethane, oil-based polyurethane, and natural oil finishes. Each type has its own set of benefits and considerations.
Water-based finishes dry quickly and have a minimal odour, making them a popular choice for many homeowners. Oil-based polyurethane offers a more durable surface and a richer finish but takes longer to dry and has a stronger odour. Natural oils penetrate the wood, offering a more organic look and feel, but may require more maintenance over time.
Apply the chosen finish to your floor after sanding. But first, ensure the floor is entirely clean and free from any dust or debris. Using a tack cloth or a microfiber cloth can be beneficial here, as these materials effectively capture any remaining fine particles.
Application Technique
Apply the finish smoothly and evenly, starting at the corner of the room and working your way out to avoid being trapped by the wet finish. Use a high-quality applicator such as a brush, roller, or lambswool applicator, depending on the type of finish and your comfort level. For best results, follow the manufacturer’s application guidelines, paying close attention to coverage rates and drying times.
Apply the first coat thinly, ensuring full coverage without pooling. Allow it to dry completely before lightly sanding it with a fine-grit sandpaper or buffer to smooth any raised grain. Remove all dust before applying the second coat. Two to three coats are typically recommended, with ample drying time between each coat to ensure a hard, durable finish.
Drying and Curing Time
Respect the drying and curing times specified by the finish manufacturer. Drying time can vary depending on the type of finish, humidity levels, and temperature.
Walk on the floors only after the recommended time, and avoid placing rugs or moving furniture back onto the surface until the finish is fully cured, which can take up to a few weeks.
Reinstalling Furniture and Rugs
Once the finish on your hardwood floors has fully cured, it’s time to carefully move your furniture and rugs back into place. This step is exciting as you see your refreshed space come together, but it’s crucial to proceed with caution to protect your newly finished floors.
Before moving furniture back onto the wood floors, clean the bottoms of furniture legs and apply new felt pads if necessary. This can prevent scratches and dents on your newly finished floors. For heavy furniture, consider using furniture sliders that distribute weight more evenly and make it easier to move items without causing damage.
When reinstalling furniture and area rugs, think about their placement. It may be the perfect time to reconsider your room’s layout to optimise space or to protect high-traffic areas on the floor. Keep rugs and heavy furniture away from areas that are still curing if the manufacturer’s recommendations suggest a full cure time longer than the initial dry time.
Wait the recommended time before placing area rugs back on the wood floors to ensure the finish has fully cured. This prevents the rugs from sticking to the finish or causing discolouration. Choosing rugs with a natural backing rather than rubber or synthetic materials can also help maintain the integrity of your floor’s finish.
Ongoing Care
With your furniture and rugs back in place, maintain the beauty and longevity of your floors with regular cleaning using products recommended by the finish manufacturer.
Avoid water and steam mops, which can damage the finish and the wood. Place mats at exterior doors to catch dirt and moisture, and maintain a consistent indoor humidity level to prevent the wood from expanding or contracting.
Frequently Asked Questions
Is dustless floor sanding really dust-free?
While often referred to as “dustless,” it’s important to note that no sanding process can be completely free of dust. Here, dustless means a more drastic dust reduction in the sanding process compared to traditional methods. A high-quality dustless sanding system will capture most of the dust generated during the process, preventing a significant amount of it from becoming airborne and settling in your home.
Can dustless floor sanding be applied to all types of flooring materials?
Yes, dustless floor sanding can suit a wide range of flooring materials, including hardwood, engineered wood, and some softer woods. However, the technique or approach might vary slightly based on the specific type of wood and its condition. For the best results, consult a professional to determine if dustless sanding is the right option for your flooring material.
Does dustless floor sanding compromise the quality of the sanding and finishing results?
Not at all. In fact, dustless floor sanding often provides superior results compared to traditional sanding methods. Without the interference of dust on the floor’s surface, the sanding process can be more precise, allowing for a smoother and more uniform finish. Moreover, better visibility during the sanding process enables more detailed work, ultimately enhancing the aesthetics of your floors.
Conclusion
Adopting the dustless floor sanding method will not only maintain the beauty and integrity of your wooden floors but also ensure a healthy environment for you and your family.
It’s a cleaner, faster, and more efficient alternative to the residential floor sanding Melbourne methods, which can fill a room with harmful wood dust.
So, choose this sustainable and effective solution for maintaining the natural charm and longevity of your floors, ensuring they remain a cherished part of your home for years to come.
If you doubt your DIY skills or don’t just have time, you can rely on Total Floor Sanding and Polishing to ensure excellent results on a budget. We promise to bring back the old charm of your floors with minimum dust in the process and no disruption in your daily routine. Get in touch with us today to uncover the hidden beauty of your floors!

