Sanding is a delicate balance between renewing the beauty of wood surfaces and maintaining their integrity. While it’s a common step in refurbishing wood flooring or furniture, it’s easy to fall into the trap of over-sanding.
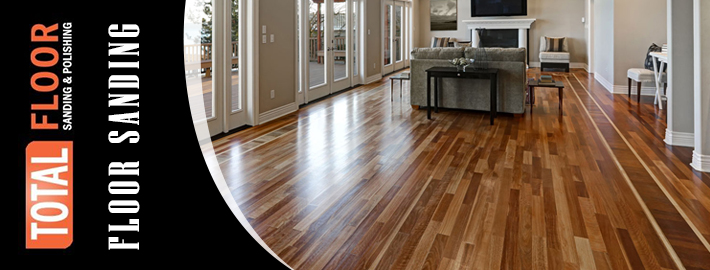
This mishap can lead to uneven surfaces, unsightly marks, and a compromised finish. But fear not. With the great knowledge and help of specialist floor sanding Melbourne service, you can fix this!
Whether it’s the grit of your sandpaper or the persistence in a single spot that’s caused the issue, fixing over-sanded wood is possible with the right approach.
This blog will guide you through correcting these sanding mistakes to achieve that flawless finish. Let’s dive into how to fix uneven sanding and erase those pesky sanding marks, ensuring your wood projects look their best.
Understanding Over-Sanding: Symptoms and Effects
- The Impact of Over-Sanding on Wood’s Porosity and Appearance
Over-sanding wood can significantly alter its porosity and appearance. It can result in a finish that falls short of expectations. When wood is sanded excessively, especially beyond 240 grit, the produced wood dust becomes so fine that it clogs the wood’s pores.
This clogging hampers stain and finish from penetrating the wood properly, risking an uneven or patchy finish. The beauty of wood flooring or furniture relies heavily on its ability to absorb stains and finishes evenly.
Over-sanding compromises this ability, leading to a lacklustre finish that highlights the wood’s damaged porosity rather than its natural grain.
Identifying Over-Sanded Areas: Divots and Uneven Surfaces
Identifying over-sanded spots on wood is crucial for rectification. These often manifest as divots or uneven surfaces where too much sanding has occurred in one spot, trying to remove a flaw or mark.
The excessive focus on a single area can create an imbalance, making the surface uneven. This unevenness is not just visual; it affects the structural integrity of the wood by creating weak spots. Consequently, understanding how to spot these over-sanded areas is the first step towards fixing them and restoring the wood’s original appeal and function.
Step-by-Step Guide to Fixing Over-Sanded Wood
The process of fixing over-sanded wood begins with identifying and then lightly shading the over-sanded areas.
Start by using a pencil to lightly shade the over-sanded spot and a generous area around it. This action helps in visualising the progress as you work to level the wood.
As you sand, the pencil marks outside the divot fade first.
Once the marks within the divot disappear, it indicates that the area has been levelled effectively.
It’s important to shade lightly, especially on softwoods, to avoid further indentations that complicate the correction process.
- Techniques for Leveling and Smoothing the Wood
After shading, the next step involves sanding the wood to level the over-sanded spots. Choose your sandpaper grit based on how deep the groove is.
Lower-grit sandpaper removes material faster but requires further sanding with higher grits to smooth out sandpaper marks.
Conversely, higher-grit sandpaper may take longer to level the wood but doesn’t leave behind coarse scratches. Sand the whole area until the pencil marks vanish, indicating a levelled surface.
Be careful to sand uniformly to avoid creating new uneven spots.
- Choosing the Right Sandpaper Grit for Effective Correction
The key to effective correction lies in choosing the appropriate sandpaper grit. If you’re dealing with deep divots, start with lower-grit sandpaper to level the surface quickly, then progressively move to higher grits to smooth out the area without leaving scratches.
A medium grit may be sufficient for shallower divots or general over-sanded areas.
Typically, alternating from 60 to 180 grit sandpaper in stages (80, 120, 150, then 180) helps erase sanding marks while gradually achieving a smooth, level surface.
Avoid sanding past 180 grit to prevent re-clogging the wood pores with fine dust.
Use the pencil trick at each stage to ensure thorough sanding and to confirm when it’s time to switch to a higher grit.
Stopping at 180 grit minimises the risk of over-sanding yet again, striking the perfect balance for a flawless finish.
Eradicating Sanding Marks for a Flawless Finish
Sanding marks: they’re the bane of any woodworking project. These unsightly blemishes can mar the smoothness and beauty of wood surfaces, detracting from the overall appearance of your piece.
Fear not, for with a few strategic steps, you can eliminate these marks and achieve that flawless finish you’ve been dreaming of.
- The Importance of Sanding With the Grain
One of the cardinal rules of sanding is to always sand with the grain of the wood. This technique is essential for minimising sanding marks.
Sanding against the grain creates scratches that are difficult to remove and can become more pronounced after staining or finishing.
By sanding with the grain, you ensure that any minor scratches you might introduce align with the wood’s natural texture. This process offers a smoother appearance and makes them easier to erase in subsequent sanding steps.
- Progressing Through Sandpaper Grits to Eliminate Marks
The key to eradicating sanding marks lies in the gradual progression of sandpaper grits.
Starting with a lower grit to remove the bulk of the material and then moving up to higher grits smoothens the wood surface without leaving behind deep scratches.
For example, you may begin with a 60-grit sandpaper to level the piece, then proceed through 80, 120, 150, and up to 180 grit.
Each step of the way, the finer grit sandpaper removes the scratches left by the previous, coarser one.
Remember, it’s generally advised not to sand past 180 grit for most projects, as too fine grit can clog wood pores and affect the stain and finish absorption.
- Staining and Finishing Without Clogging the Pores
When you’re ready to stain or finish your wood, make sure the surface is prepped correctly to avoid clogging the pores.
Over-sanding with very fine grits can create wood dust that fills these pores, preventing stains and finishes from penetrating properly.
If you find yourself in a situation where the wood isn’t absorbing the stain, a round of sanding with a lower grit, like 80, can open up the pores again.
Afterwards, gradually work your way up to 180 grit, checking to ensure you’re not reintroducing fine dust that could clog the pores.
Prevention and Best Practices in Sanding
Achieving a flawless finish begins with preventing sanding mistakes.
Here are some best practices that can help you avoid common sanding pitfalls and ensure a smooth, even finish.
- How to Avoid Over-Sanding: Tips and Tricks
Over-sanding can lead to uneven surfaces or divots, especially when too much time or pressure is applied to one spot.
To prevent this, sand evenly across the surface and avoid lingering on any single area. If removing a defect, it can be helpful to lightly mark the area and the wood around it with a pencil.
As you sand, the disappearance of pencil marks can guide you to a level surface without overdoing it. Remember, gentle and consistent pressure is your friend.
- Sandpaper Grit Selection
Choosing the right sandpaper grit is crucial for effective sanding.
Start with a coarse grit to remove major imperfections and gradually work your way up to finer grits for smoothing the surface.
Jumping straight to a very fine grit can be tempting for a smooth finish, but it risks leaving deeper scratches from earlier stages unaddressed.
A general guide is to start around 60 or 80 grit for major levelling, then progress through 120, 150, and end at 180 grit for most projects.
Conclusion
Congratulations! You’ve made it through the nitty-gritty details of how to fix those pesky sanding mistakes.
Whether you’ve over-sanded a spot into submission or enthusiastically sanded your wood beyond the 180-grit mark, rest assured, knowing there’s a way to recover and still achieve that flawless finish you’re aiming for.
Remember, sanding is an art as much as it is a science. It requires patience, the right technique, and sometimes a little bit of elbow grease to get it just right.
But don’t let this intimidate you. For great fixes and accurate results, consider hiring a specialist floor sanding Melbourne service from Total Floor Sanding and Polishing.
We are floor fixers and pros in turning uneven floors into masterpieces.
So why wait? Shiny floors await you at Total Floor Sanding and Polishing.

