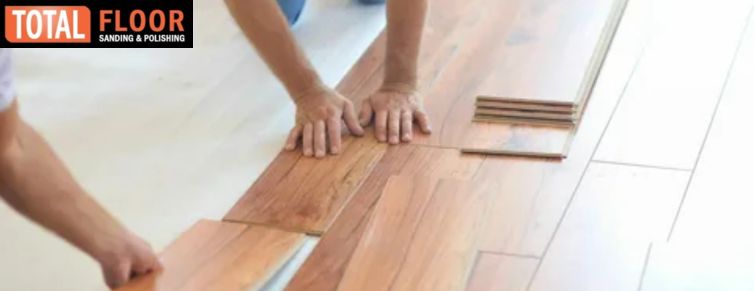
You just ripped up all that old carpet or flooring and found beautiful hardwood floors underneath. But before you call it a win, those floors need some serious TLC. We’re talking sanding, staining, sealing – the works.
Choosing the right sander for the job is key, but with drum sanders, orbital sanders, and edge sanders to pick from, it can get confusing. This article will break down the types of floor sanders and what they’re best for, and help you decide which is right for your floors and project.
We’ll cover everything you need to know so you can DIY refinish those hidden gem wood floors like a pro.
Types of Floor Sanding Machines
When it comes to timber floor sanding in Melbourne, having the right tools for the job makes all the difference. The three most common types of floor sanding machines are belt sanders, orbital sanders, and drum sanders.
Choosing the correct sander will depend on the current condition of your floors and how much wood you need to remove.
Belt Sanders
Belt sanders are very effective for sanding large areas and aggressively removing damaged or worn wood fibers from floors. They use a loop of sandpaper that spins at high speeds to quickly sand wood.
However, belt sanders can be difficult to control and may leave swirl marks in the wood. Only use a belt sander if your floors are in poor condition or you need to remove a significant amount of wood.
Orbital Sanders
Orbital or random orbital sanders are very versatile and easy to control. They use round sanding pads that spin and oscillate in random patterns, leaving a smooth finish. Orbital sanders are great for light sanding, fine finishing work, and sanding corners or edges. However, they may require multiple passes to sand large or uneven areas.
Orbital sanders are a great choice if you only need to do minor repairs, screening, or light sanding between refinishing coats.
Drum Sanders
Drum sanders are highly efficient floor sanding machines suited for sanding large wood floors with minor to moderate damage. They utilize a rotating drum with sandpaper that spins at high speeds. Drum sanders can quickly sand wood floors smoothly while still being easy to manoeuvre and control.
They require a certain level of experience to operate and may leave swirl marks if not used properly. Drum sanders are ideal if you need to sand an entire wood floor with minor imperfections or uneven areas.
The key to achieving beautiful wood floors is choosing the right sander for your needs. Start with less aggressive options like orbital or drum sanders, then move on to more heavy-duty belt sanders only as needed. With the proper technique and grits of sandpaper, you’ll have your wood floors looking brand new in no time!
Key Factors to Consider When Choosing a Floor Sander
When selecting a floor sander, there are a few key factors to keep in mind:
Sanding Disc Size
Floor sanders come with different-sized sanding discs, ranging from small detail discs for tight spaces to large discs over 20 inches in diameter for big, open floors. Think about the size of your floors and whether you need a sander for just corners and edges or for large, main areas.
The larger the disc, the more efficient the sanding. However, larger discs can be more difficult to maneuver.
Motor Power
The power of the sander’s motor directly impacts how quickly and effectively it can sand floors. More powerful motors, ranging from 3 to 5 amperes or more, can handle heavier sanding and larger floors.
For DIY use on most residential wood floors, a 3 to 4 amp motor should work well. Underpowered sanders can struggle with denser wood types like oak or maple.
Dust Containment
Floor sanding generates a lot of dust, so effective dust containment and extraction is important. Look for a sander with a built-in dust bag and vacuum ports to hook up an external shop vacuum.
Some higher-end models offer advanced dust skirts and filters for nearly dust-free operation.
Additional Features
Other useful features to consider include:
- Variable speed control: Allows you to adjust sanding speed for different wood types and grits. Start with a slower speed for coarser grits.
- Edge or detail sanding capabilities: For sanding corners, edges and hard-to-reach areas. Either a separate detail sander or attachments for your main sander.
- Carrying case: For safe storage and transport of your sander and all its parts.
- Warranty: Most floor sanders come with at least a 1- to 3-year warranty. Longer warranties of 5 years or more provide more coverage for the investment.
By assessing these key factors and determining what’s most important for your specific floor sanding needs, you can choose a floor sander that will get the job done efficiently, safely and with professional results.
The time spent researching and choosing the right sander is well worth it for a successful DIY floor refinishing project.
Operating and Maintaining Your Floor Sanding Machine
Now that you have your floor sanding machine, it’s important to operate and maintain it properly to get the best results. Using and caring for this equipment correctly will help ensure an even, smooth finish and a long machine lifespan.
When sanding, move the machine slowly and steadily across the floor using overlapping passes. Work in the direction of the wood grain for the best finish. Apply light pressure and make multiple passes with progressively finer grits of sandpaper. Start with a coarser grit to quickly level the floor, then repeat with medium and fine grits. Check your work with a bright light as you go to spot any missed areas.
Empty the dust bag frequently as you sand to prevent overheating and loss of suction. A full dust bag reduces efficiency and can damage the motor. Also, be sure to wear proper protective gear like a dust mask, goggles and ear protection. Wood dust can irritate eyes, nose and throat, and the machine noise can damage hearing.
After sanding, thoroughly clean and maintain your machine to keep it in good working order. Wipe down and vacuum the entire machine to remove all dust buildup that can clog moving parts. Lubricate joints, bearings and the sanding pad mount as directed in the owner’s manual. Release the tension on the sanding pad and change or rotate the sandpaper to prevent uneven wear. Tighten, adjust or replace any loose or worn parts.
Proper care and maintenance will extend the life of your floor sanding machine and help ensure consistent, high-quality results. Performing regular inspections and tune-ups, lubricating, cleaning and replacing worn parts as needed will keep your machine in tip-top shape for your floor refinishing projects. With the proper techniques and care, you’ll be sanding and re-finishing wood floors like a pro in no time!
Conclusion
Selecting the right floor sanding machine is key for a perfect finish in your flooring project. There are different types, like belt sanders for larger areas and orbital sanders for precision work.
Consider your flooring type, project size, and your skill level to pick the best one. Remember, investing in the right tool ensures efficiency and quality, giving you a beautifully renewed floor.
With this knowledge, start your floor sanding confidently, knowing the chosen machine is ready to transform your space into a polished masterpiece.
If you are unsure about your DIY skills, consider getting help from a timber floor sanding Melbourne professional. Total Floor Sanding And Polishing is your go-to choice when considering a floor transformation. Our experts use advanced techniques and tools to achieve the desired outcomes for every client. Reach out to our team and let us exceed your expectations!

