So your hardwood floors are looking dull and worn, huh? Don’t worry, there’s an easy solution, and it doesn’t involve ripping them out and starting over. Floor sanding Geelong can revive your wood floors and have them look brand new again. You probably think that sounds like a big, messy job, but it’s pretty straightforward.
With a few essential tools and a weekend of work, you can transform your floors yourself. The secret to beautiful wood floors is stripping the old finish and paint and sanding them to smooth bare wood. Then re-staining and sealing them with a fresh coat of polyurethane will make them shine like new. Who knew it could be so simple? If you’re ready to roll up your sleeves and get started, we’ve got everything you need to know about how to sand wood floors yourself. Your gorgeous new floors are just a few steps away.
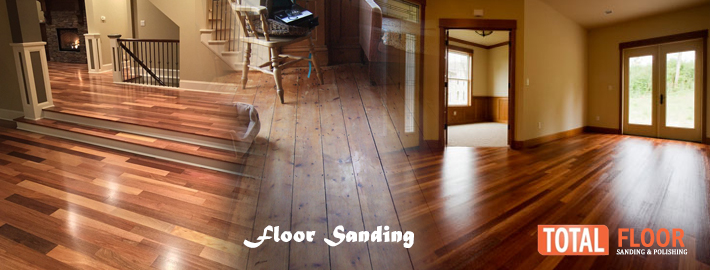
Why Floor Sanding Is Important
If you want gorgeous wood floors that shine like new, floor sanding is a must. Why is it so important?
For starters, sanding removes the old, dull finish and smooths the surface. Without sanding, any new finish you apply won’t last, and your floors will look uneven and patchy. Floor sanding also allows the wood grain to show through, bringing out the natural beauty in the wood. There’s nothing quite like the warm glow of freshly sanded hardwood.
The sanding process removes any imperfections, scratches, or water damage in the wood. It can make old; worn floors look brand new again. Even if your floors are in pretty good shape, sanding will give them an ultra-smooth finish and sheen.
Finally, sanding provides a “tooth” for the new finish to grip onto. Without lightly sanding first, the finish won’t properly adhere to the wood and will start to peel or chip much sooner. For the best results, you need to prepare the surface.
Ultimately, floor sanding leads to wood floors that shine with a mirror-like gloss and a finish lasting for years. It highlights the wood grain, erases damage and flaws, and creates an ideal surface for coating. Your floors will look better than ever and stay that way. All thanks to the power of sanding!
How Floor Sanding Works: The Step-by-Step Process
To get gorgeous wood floors, you’ll need to sand down the surface. Floor sanding removes the top layers of wood to smooth out imperfections and prep the floor for a fresh coat of sealant.
Here’s how the sanding process works:
- Do an initial coarse sanding. Use 60-80 grit sandpaper to sand out significant dings, dents, and scratches. This will significantly smooth and flatten the floor.
- Progress to medium sanding. Apply 100-120 grit sandpaper for the majority of the sanding. Move the sander slowly and evenly across the floor using overlapping passes. Vacuum away dust with each access.
- Finish with fine sanding. For the final sanding, use 150+ grit sandpaper. This will make the floor silky and smooth to the touch. Multiple passes with fine grit will achieve an almost polished surface.
- Edge and detail sanding. For tight corners and edges, you’ll need to sand manually or use an edge sander. Detail sanders or sanding sponges also work well for corners and minor imperfections.
- Wipe and vacuum. Thoroughly wipe away all dust with tack or microfiber cloths and vacuum the floor with a brush attachment. The floor needs to be completely clean before applying a sealant.
With some elbow grease and the proper sanding technique, you’ll transform your wood floors into a smooth, flawless surface ready for a fresh finish. The results of all your hard work will be well worth it!

Choosing the Right Floor Sander and Sandpaper Grit
Choosing the right floor sander and sandpaper grit is critical to achieving beautiful wood floors. The type of sander you use depends on the current condition of your floors and how much wood you need to remove.
Floor Sanders
For rough, heavily damaged floors, start with a belt sander. These heavy-duty sanders can quickly strip away layers of wood. Be careful using a belt sander, as it can gouge floors if not properly handled.
For most DIYers, a random orbit sander is a great choice. These versatile sanders can smooth wood floors without leaving visible scratch marks. They work by spinning an offset pad in small, random orbits. Start with a coarser 40- or 60-grit sandpaper and progress to finer grits.
If your floors just need light sanding or you want to sand small areas like corners, a hand sander or palm sander works well. They give you more control but require some elbow grease!
Sandpaper Grit
The grit refers to the number of sand granules per square inch of sandpaper. Lower grits like 40 or 60 are coarse, while higher grits like 220 are excellent. Generally, start with a coarser grit to sand damaged or uneven areas aggressively, then progress to finer and finer grits until you achieve a smooth finish.
For most wood floors, you’ll want to progress from coarse (40-60 grit) to medium (80-120 grit) to fine (150-220 grit). Test the smoothness with your hand to ensure an even, polished surface. Wipe away dust with tack cloths between grit changes.
Following these tips will ensure you choose the proper floor sander and sandpaper. Start coarser and get progressively finer for beautiful, professional-looking wood floors you’ll be proud of.
Floor Sanding Tips and Tricks for DIYers
Once you’ve done the prep work, it’s time to start floor sanding Geelong. This process involves using progressively finer grits of sandpaper to smooth and refine the wood. For DIYers new to floor sanding, here are some tips to help you get the best results:
Start with a coarser grit
Begin with a coarser grit, like 40 or 60, to quickly level the floor. Work slowly toward the grain using a sanding pad or pole sander—vacuum thoroughly when done to remove dust before moving to a finer grit.
Move to medium, then fine grits.
Switch to medium grit, like 80 or 100, for your next pass. Repeat vacuuming and then finish with a fine grit like 120 or 150. The finer the grit, the smoother your floor will become. Take your time—rushing can lead to an uneven surface.
Focus on edges and corners
Pay extra attention to edges, corners, and the spaces between boards. These areas often need more sanding to level and smooth the wood. You may need to do some sanding by hand in tight areas where machines can’t reach.
Check your work with a bright light
Use a bright work light or flashlight to inspect the floor. Look for any remaining rough spots, scratches, or uneven areas and re-sand as needed. For the best results, sand until the floor is smooth and even.
Vacuum and wipe thoroughly
Vacuuming and wiping away dust with a tack cloth after each sanding is critical. Leftover dust will stick to the floor finish or paint, creating an uneven coat and dulling the final look of your wood floor.
With some patience and the right techniques, you can achieve professional-level results sanding your wood floors. Take your time and don’t cut corners—your efforts will pay off with a beautiful, smooth floor you’ll enjoy for years to come.
Protecting Your Floors After Sanding
Now that your floors have been sanded to a smooth finish, it’s time to protect them. Applying a finish, whether oil, wax, or polyurethane, seals the wood and shields it from damage. Without a finish, your floors would be susceptible to stains, scratches, and water damage in no time.
Choose a Finish
The most common finishes for hardwood floors are oil, wax, and polyurethane. Oil and wax create a natural matte finish but require frequent reapplication. Polyurethane creates a durable, protective coat in a matte, satin, or high-gloss sheen. For high-traffic areas, a floor finish with a polyurethane base is your best option. It seals and protects the wood for years with just a few coats.

Apply the Finish
Follow the directions on your product to apply the finish properly. In general:
- Clean and lightly sand the floors to provide a “tooth” for the finish to adhere to. Vacuum and wipe away dust with a tack cloth.
- Apply 2-3 coats of finish, waiting 2-3 hours between coats. More coats mean more protection.
- Use a brush to apply the finish along edges and corners, then use a roller for large, open areas. Always brush in the direction of the grain for an even coat.
- Avoid walking on the floors for at least 24-48 hours to prevent damage while the finish dries. Place furniture sliders under chair legs, sofas, tables, and other heavy furniture when moving them back onto the floors.
- Consider applying a sealant or protective topcoat like polyurethane over oil or wax finishes for more durability. Reapply as directed to maintain protection.
- For high-traffic commercial areas, a floor finish with aluminum oxide or ceramic beads provides maximum durability. Reapply every 3-5 years to keep floors looking their best.
By choosing a high-quality finish suited to your needs and adequately applying and maintaining it, your newly sanded wood floors will stay beautiful and protected for years. With some primary care and precautions, your floors will continue to be the focal point of your home.
FAQs: Everything You Need to Know About Floor Sanding
Floor sanding can seem complicated, but by following some tips, you’ll be well on your way to beautiful hardwood floors.
How long does floor sanding take?
The time it takes to sand floors depends on the square footage, number of coats of finish, and condition of your floors. As a rough estimate:
- Sanding and finishing an average-sized room (15’x15′) will take 1 to 2 days.
- An entire house of hardwood floors (1500 to 3000 square feet) usually takes 3 to 5 days.
The actual sanding process only takes a few hours, but you need to factor in time for cleanup, drying between coats of finish, and moving furniture. For the best results, be prepared to stay off your floors for at least 24 to 48 hours after the final coat of finish is applied.
Do I need to leave the house during floor sanding?
It’s a good idea for you and your family to vacate the house during the sanding and refinishing process. Floor sanding generates a lot of fine dust that settles over everything in the home. Leaving the house will:
- Ensure you’re not breathing in wood dust, which can be an irritant.
- Allow the flooring contractors to work more efficiently without constantly cleaning up after themselves.
- Prevent the dust from damaging furniture, electronics, or settling into fabrics in the home.
If leaving isn’t possible, seal off vents and doors to contain the dust in the room being worked on. Be prepared to do a deep cleaning after the project is done.
How much does professional floor sanding cost?
The cost to sand and refinish hardwood floors is typically between $3 to $5 per square foot. So you can expect to pay the following:
- $450 to $750 for a small room (15’x15′)
- $3000 to $5000 for an average-sized house (1500 to 3000 square feet)
The total cost will depend on the condition of your floors, type of wood, number of rooms, and number of coats of finish requested. Getting multiple estimates from reputable contractors is recommended.
Conclusion
So there you have it, the not-so-secret truth behind beautiful wood floors. Floor sanding Geelong, while tedious, yields gorgeous results if done correctly. Now that you’re armed with the knowledge of sanding techniques, grits, and sealants, you’ll be well on your way to wood floors that look like they came straight out of an interior design magazine.
The next time you kick off your shoes and feel the smooth, polished wood under your feet, you can smile knowing all the hard work that went into making your space shine. Wood floor sanding may not be the most glamorous of DIY tasks, but the rewards of your labor will last for years to come. Total Floor Sanding And Polishing is your go-to solution for transforming tired and worn-out floors into stunning masterpieces. Trust us to revive your floors and create a beautifully polished finish that enhances the aesthetics and value of your home or business.

