You love the look of hardwood floors and were thrilled when you discovered the original wood floors hiding under the dingy carpet in your old house. But after pulling up the carpet, you realised the floors underneath needed some serious work. Years of wear and tear have left them scuffed, scratched, and dull. Don’t despair—with some elbow grease and the right tools, you can sand away damage and restore your wood floors to their former glory.
Floor sanding Geelong may seem like an intimidating task, but with the right techniques and equipment, anyone can do it themselves. This guide will walk you through everything you need to know to sand and refinish your wood floors and have them look like new again. You’ll learn how to assess your floors’ condition, rent the necessary equipment, properly sand out imperfections, apply a protective finish, and maintain your floors for years to come. Before you know it, you’ll be sliding in your socks across smooth, glossy wood floors that add warmth and style to your home. Let’s get started!
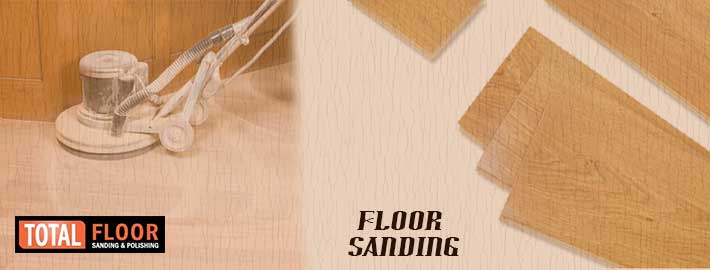
Why Sand Your Wood Floors?
Why go through the hassle of sanding your wood floors? There are several reasons it’s worth the effort.
First, sanding removes the top layer of wood, smoothing the surface and evening out any imperfections. This helps floors look glossy and new again. Scratches, water damage, and wear and tear disappear, leaving pristine wood in its place.
Second, sanding preps floors for a protective finish like polyurethane or lacquer. These sealants soak into the wood to shield it from future damage. But they can’t penetrate properly if the wood surface isn’t smooth. Sanding provides the clean, even surface they need to work their magic.
Finally, sanding is often the only way to change the color or sheen of wood floors. Want to go darker or switch from satin to glossy? Sanding removes the existing finish so you can apply a fresh coat in your color and sheen of choice.
While sanding hardwood floors requires time and patience, the rewards are well worth it. Smooth, flawless floors that look brand new. Long-lasting protection for your investment. The freedom to customise color and finish. Professional sanding and refinishing is also an option, but for many DIYers, restoring wood floors themselves is a labor of love.
With the proper tools and technique, you can bring new life to tired, damaged wood floors and keep them beautiful for years to come. Your home will thank you, and so will your bare feet!

Floor Sanding Equipment You’ll Need
To get your wood floors looking new again, you’ll need some essential equipment.
Floor sander
The big machine that does the bulk of the work. For DIY, rent an orbital sander, random orbital sander, or multi-disk sander. These are easier to control than drum sanders and less likely to damage the floor. Look for one with dust extraction to minimise mess.
Sandpaper
You’ll want a range of grits: coarser for rough sanding (40 to 60 grit), medium (80 to 120 grit) for smoothing, and fine (150 to 220 grit) for finishing. The higher the grit, the smoother the result. Buy sandpaper sheets that attach to your sander.
Edger
This hand sander lets you sand along the edges of the room and in tight spaces where the big sander won’t reach. You’ll want the same range of grits as the floor sander.
Vacuum
A shop vac, preferably with a HEPA filter, is essential for cleaning up dust between sanding and before applying the finish.
Tack cloths
These sticky cloths are great for wiping away fine dust particles after vacuuming.
Paintbrush
For spreading wood filler, stain, or finish in corners and edges. Get a medium-sized brush with soft, natural bristles.
With the right tools and some elbow grease, you’ll have your wood floors smooth and ready for a fresh finish in no time. The results will be well worth the effort!
Sanding Wood Floors Step-by-Step
Now that you have the proper tools and safety gear, it’s time to start sanding. The key is to go slowly and methodically, working in stages from coarser to finer grits.
- Rough sand with 80-100 grit
Attach the 80 or 100-grit sandpaper to your sanding machine and plug it in. Move the sander slowly but steadily over the floor using overlapping passes. Vacuum away dust with the shop vac frequently. This initial rough floor sanding Geelong will smooth the surface and provide a “tooth” for the finer grits to adhere to.
- Progress to 120 or 150 grit
Change the sandpaper to the next finest grit, around 120 or 150. Go over the entire floor again with overlapping passes. Check your work with a tack cloth as you go to ensure an even, smooth surface. Vacuum and wipe away the dust before it builds up.
- Finish sand with 180-220 grit
For the final sanding, use 180, 200, or 220-grit sandpaper. Repeat the process of slow, overlapping passes across the whole floor. Wipe and vacuum thoroughly after each section. At this point, the floor should feel almost perfectly smooth to the touch.
- Screen the floor (optional)
For an ultra-smooth finish, you can screen the floor with a sanding screen (around 280 grit) attached to a sanding machine. Use light pressure and vacuum frequently. Screening provides a flawless surface for the finish to adhere to.
- Vacuum, wipe, and tack cloth
Give the floor a final vacuuming, wipe-down, and tack cloth. The floor needs to be immaculately clean of dust for the finish to go on smoothly. Use a damp mop or cloth to wipe the floor and pick up any remaining fine particles. Follow with a tack cloth for any remaining debris. Your floor is now ready for staining and sealing!
The key to sanding wood floors is taking your time and progressing through the grits methodically. Work slowly in sections, wipe and vacuum away dust frequently, and check your progress to ensure an even, smooth finish across the whole floor. With some patience, you’ll restore your wood floors to their original glory.

How to Choose Floor Sandpaper Grit
The grit of sandpaper refers to how coarse or fine it is. For floor sanding, you’ll need a range of grits to progressively smooth and refine the wood. Choosing the proper grit sequence is important for achieving a flawless finish.
Start with a coarser grit, around 40 to 60, to sand out imperfections and smooth over rough areas. Then progressively move to finer grits, like 80 to 120. End with an ultra-fine grit of 150 to 220 for a glassy smooth finish before applying your final sealant or stain.
Some tips for selecting sandpaper grit:
- Always start with a coarser grit and work your way finer. Going from fine to coarse can damage the wood.
- Don’t skip too many grit sizes at a time. Move up in increments of 20 to 40 for the best results.
- Finer grits, 150 and above, are best for recoating floors that are already finished. They will lightly sand the surface without damaging the existing finish.
- For stubborn stains or water damage, you may need to start lower at 20 to 36 grit to sand out the damage before moving to typical floor sanding grits.
- Consider the wood type. Softer woods may require finer final grits, while harder woods can handle slightly coarser grits.
- Check the recommendations from your floor finish product for the appropriate final grit to ensure proper adhesion.
Following these tips will help you choose a floor sanding grit sequence to create the flawless, smooth floor you desire. Start rough and keep going until the wood feels like silk. With a proper sanding technique and the right grit selection, you’ll restore your wood floors to their gleaming glory in no time.
Applying Floor Finishes for Protection
Once you’ve sanded your wood floors smoothly, it’s time to protect them with a finish. Floor finishes seal and shields the wood from damage, stains, and wear. They also enhance the natural beauty of the wood. There are several options to choose from:
Polyurethane
Polyurethane is a popular choice for wood floors. It comes in both oil-based and water-based formulas. Oil-based polyurethane has a strong odor but provides the hardest, most durable finish. Water-based polyurethane has a low odor and VOC emissions but may require more coats. Both provide excellent protection for wood floors. Apply 2-3 coats, waiting 2-3 hours between coats.
Lacquer
Lacquer is another durable finish made from lacquer thinner and lacquer resin. It dries very quickly but has strong fumes. Lacquer provides a high-gloss, plasticized finish and requires a primer. It typically requires 3-4 coats. Lacquer is not the most DIY-friendly product, but it provides a tough, protective coating.
Hardwax Oil
Hardwax oil is a natural finish made from plant-based oils and waxes like tung or linseed oil. It soaks into the wood, protecting it from within while still allowing the wood to breathe. Hardwax oil has little odor, is very durable, and enhances the natural grain of the wood. It typically requires 2-3 coats, waiting 24 hours between applications. Hardwax oil provides a matte finish but can be topped with polyurethane for more shine.
Floor Wax or Paste Wax
Floor wax and paste wax provide a protective coating for wood floors with a soft sheen. They require frequent reapplication but have little odor and are very DIY-friendly. Wax finishes are not very durable but are a good choice if you want to avoid harsh chemicals. Apply 2-3 coats of wax, buffing between applications. Reapply every few months to maintain protection.
Choosing a floor finish is an important step in the sanding and refinishing process. Consider the level of protection, durability, and shine you want, as well as odor and VOC emissions. With the right finish and proper application, your newly sanded wood floors will look gorgeous for years to come.
Conclusion
So now you have all the information to give your wood floors a new lease on life. The floor sanding Geelong process may seem tedious, but the results will be well worth the effort. Take your time to research the right tools and techniques, then dive in and get to work. Your floors have been part of your home’s history – now you can preserve their beauty for years to come.
Once you’ve finished sanding, staining, and sealing those floors, stand back and admire your work. Run your hands over the silky smooth wood and enjoy the warmth and rich glow. Your floors will be the envy of visitors and a source of pride every time you walk through your home.
Restore your wood floors and restore the heart of your house. Total Floor Sanding and Polishing is your go-to solution for transforming your floors into stunning masterpieces. Our skilled team uses advanced techniques and top-quality materials to ensure a flawless finish, leaving your space with a renewed sense of elegance and charm.

