You love your hardwood floors, but they’re looking a little worn around the edges, which can be an eyesore to you and your guests alike. Don’t despair! Sanding hardwood floors doesn’t have to be pricey or complicated. With the right tools and some know-how, you can have beautiful and well-protected hardwood floors in no time at all. Read on for the steps involved in sanding your own hardwood floors—why hiring an expert makes sense….
Identify if your floors are hardwood
If you’re refinishing your hardwood floors and aren’t sure if they are, simply run your finger along a seam between two boards. If there is a noticeable change in texture, you know it’s not hardwood. The wood should feel smooth under your fingertip. In addition, hardwoods don’t dent or crack as easily as other flooring materials such as tile and linoleum, so if you find a crack or dent in any part of your floor that doesn’t look like it came from traffic wear and tear (where someone might have tripped over), chances are you have something else on your hands.
Prepare for sanding and refinishing
Before sanding hardwood floors, it’s important to make sure you are doing it in a way that will result in successful results. Before hiring a professional, consider whether or not your floors need to be stripped. Stripping means removing layers of paint or other floor finishes in order for refinishing products to have a smooth surface on which they can work their magic. You may find that stripping is as simple as using some fine-grit sandpaper. It’s also recommended that you remove furnishings from rooms where hardwood floor sanding and refinishing is being performed, just so everything goes smoothly without any stumbles along the way. Floor sanders should never be walked on until after final sealing and/or top coat applications are completed!
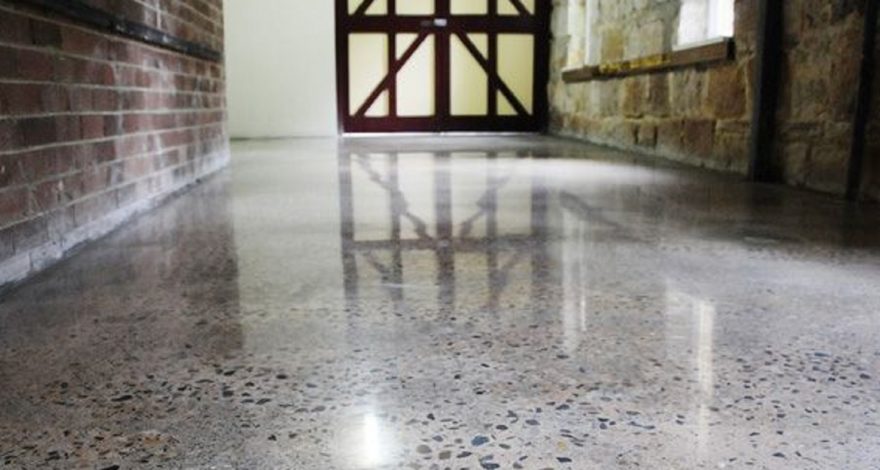
Sand the floor with high grit paper
Start by sanding your floor with a high grit paper. The surface must be completely smooth before any refinishing can take place. Our experts at Floor Saver will use 80 or 100 grit papers to remove scratches and remove dirt and grime from your floor. We’ll then move on to using 150 or 180 grit papers, followed by 220 or 320 grit papers if necessary, depending on how worn down your floor is. Experts know exactly what level of the paper is needed for every job; don’t cut corners here! If you try to complete these steps yourself, there is a great chance that you will cause some damage that may ruin your floor entirely.
Buffing and Cleaning
You don’t need floor sanding Melbourne experts on hand to buff or clean your floors. You can easily buff floors yourself using a dry mop or rag. To do so, soak a soft cloth with clean water and wring it out until it is no longer dripping wet. Then, wipe down your floor in a downward motion from one end of your room toward another. That should effectively buff any dirt particles off your floor without marring its finish or damaging your hardwood surface.
Stain or Seal off grout lines (if necessary)
The first step in refinishing a hardwood floor is to sand it. Some floors have already been pre-sanded, while others will need further sanding. This step is done on a grinding machine that uses large sandpaper belts. Grout lines between boards are often left unstained and unsealed so they can be touched up as needed.
Apply Clear Polyurethane
Once you’ve sanded your floors, you’ll need to apply a clear polyurethane. Polyurethane is what will protect your floor from water and stains. There are two ways to do it: You can buy polyurethane in a can and use a paint roller or brush (or both) for larger areas; for small corners and edges, go with a foam brush. But before you start spraying, make sure that your floors are clean and dry. Any leftover dust will act as tiny pins that get stuck on your floors when you roll or brush on liquid polyurethane.
If you want your floors consistently coloured, these lines must be sealed off; otherwise, you’ll end up with a patchwork pattern once they’re refinished with fresh stain or sealant. There are many different types of grinders and machines available, so if you don’t want unnecessary expense in doing it yourself, consider hiring a professional floor sanding Melbourne services instead.

