Timber floors are not only durable but also add warmth and character to any space. However, over time, they can become worn and lose their lustre. Sanding is an essential part of timber floor maintenance, as it helps to restore the surface to its former glory. In this comprehensive guide, we’ll walk you through the step-by-step process of sanding a timber floor, from preparation to finishing touches.
Moreover, hiring an expert in floor sanding Melbourne offers peace of mind, knowing that the project is in capable hands and will be completed with precision and professionalism. They can advise on the best practices for maintaining the floor’s appearance and durability post-sanding, prolonging its lifespan, and minimising the need for future repairs or refinishing. By investing in the expertise of a skilled professional, homeowners can enjoy the timeless elegance and charm of their timber floors for years to come, making it a worthwhile endeavor for any property.
Preparation
Before sanding a timber floor, ensure the surface is free of debris and protruding nails. Additionally, seal off adjacent rooms to prevent dust from spreading during the sanding process.
Assess the Condition of the Floor
Before embarking on the sanding process, a meticulous assessment of the timber floor’s condition is imperative. Scrutinise the surface for signs of wear, such as scratches, dents, or stubborn stains, noting areas in need of targeted treatment. Furthermore, meticulously scan for any protruding nails or staples that could disrupt the sanding process and require removal beforehand. This comprehensive evaluation ensures that the sanding process proceeds smoothly, facilitating effective restoration while minimising the risk of inadvertent damage to the timber floor.
Gather the Necessary Equipment
Sanding a timber floor requires essential tools and safety gear. These include a drum sander, an edge sander, sandpaper with varying grits, a vacuum cleaner, and protective equipment like goggles and a dust mask. Before starting, confirm that all equipment is functioning correctly to ensure smooth progress throughout the sanding process.
Sanding
To sand a timber floor effectively, start by clearing the room and inspecting the floor for any damage or protruding nails.
Start with Coarse Grit Sandpaper
Begin the sanding process with coarse grit sandpaper, typically rated around 36 or 40 grit, to efficiently eradicate surface imperfections and level the floor. Adopt a methodical approach, with the help of an expert in floor sanding Melbourne and beyond, ensuring smooth, consistent strokes while guiding the sander parallel to the wood grain.
This meticulous technique enables the gradual elimination of flaws while safeguarding the authentic texture of the timber floor. By adhering to the natural grain pattern, the sanding process achieves a harmonious blend, resulting in a refined surface that accentuates the inherent beauty of the wood.
Gradually Progress to Finer Grits
After completing the initial sanding with coarse grit sandpaper, transition to a finer grit, typically 60 or 80 grit, proceed by repeating the sanding process, gradually progressing to even finer grits with each iteration.
This method facilitates the refinement of the surface, effectively eliminating any lingering scratches or blemishes. By systematically advancing through finer grits, the floor achieves a smoother texture and a more uniform appearance, ensuring a flawless finish that enhances the overall aesthetic appeal of the timber floor.
Edge Sanding
When utilising an edge sander, focus on sanding along the edges of the room and in narrow or confined spaces inaccessible to the drum sander. Exercise caution to avoid over-sanding, which may lead to uneven patches.
Employ controlled movements and lighter pressure to ensure consistent sanding across all areas, maintaining the floor’s uniformity. This approach guarantees meticulous attention to detail, effectively refining even the most challenging sections with precision and finesse.
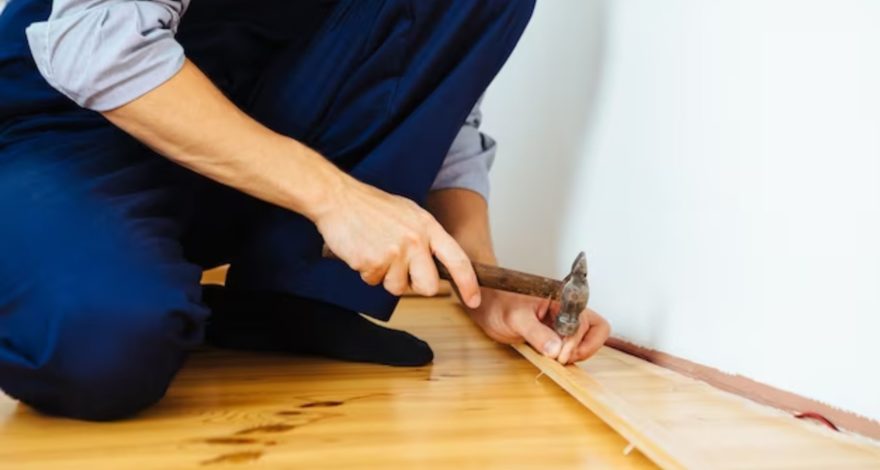
Finishing Touches
Complete the sanding process by thoroughly vacuuming the floor to remove any dust or debris. Next, wipe the surface with a tack cloth to ensure it’s clean and ready for finishing. Apply a wood conditioner to enhance the timber’s natural colour and promote even absorption of the finish. Finally, choose a suitable finish and apply it evenly with a brush or roller.
Vacuum and Clean the Floor
After completing the sanding process, it’s crucial to meticulously clean the floor to remove any dust and debris. Begin by thoroughly vacuuming the entire surface to eliminate loose particles. Then, dampen a cloth with water and wipe down the floor, ensuring all remaining sanding residue is removed. This meticulous cleaning step is essential to prepare the surface for any subsequent treatments or finishes, ensuring optimal adhesion and a flawless final result. Taking the time to properly clean the floor post-sanding helps to achieve a smooth and pristine surface, ready for further enhancement and protection.
Apply a Finish
Complete the timber floor restoration process by applying a protective finish to safeguard its integrity and enhance its aesthetic appeal. Select a finish tailored to your preferences and the requirements of the area, whether it’s a clear varnish, oil, or wax. Adhere to the expert in floor sanding Melbourne guidelines for application, ensuring thorough coverage and even distribution.
Allow ample time for the finish to dry completely before allowing foot traffic on the floor. This final step not only provides essential protection against wear and tear but also accentuates the natural beauty of the timber, creating a durable and visually pleasing surface that enhances the ambience of any space.
By following these steps, you can successfully sand a timber floor and breathe new life into your space. With proper maintenance, your timber floor will continue to be a beautiful and timeless feature of your home for years to come.
Final Thoughts
Sanding a timber floor is a transformative process that rejuvenates its appearance and enhances its longevity. By meticulously following the steps outlined in this comprehensive guide, homeowners can restore their timber floors to their former glory.
When it comes to preserving the pristine condition of your timber floors, entrusting the task to Total Floor Sanding and Polishing ensures superior results. As an expert in floor sanding Melbourne, our team is dedicated to delivering unparalleled craftsmanship and precision. With years of experience and a deep understanding of timber floor maintenance, our specialists employ the most effective techniques to restore your floors to their former glory. From meticulous preparation to the application of high-quality finishes, we prioritise excellence in every aspect of the sanding process. Choose us today and witness the transformation of your timber floors into timeless masterpieces.

