Parquet flooring has a timeless elegance and beautiful intricate geometric patterns, so it adds a classical touch to any space. However, these beautiful floors can become scuffed and worn over time, so their natural charm gets hidden under layers of dirt and old finishes.
You must regularly give your floors a refinishing touch to keep their shine. While some homeowners prefer hiring floor sanders Melbourne, some may do it themselves.
If you want to sand parquet floors by yourself, we have provided detailed steps and essential tips on how to sand parquet floors effectively, ensuring that you maintain their beauty and durability.
Whether your floors are just dull and scratched or showing signs of serious wear and tear, our guide will help you breathe new life into your parquet floors.
What is Parquet Flooring?
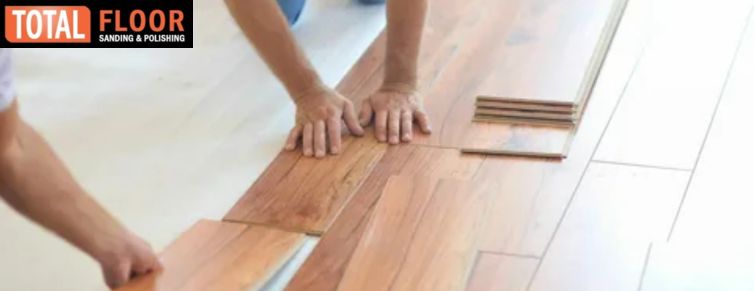
Parquet flooring, known for its visual appeal and lasting durability, is made from small blocks or strips of wood arranged to form a geometric pattern. This flooring style often varies from simple angular designs like herringbone to intricate motifs, offering both aesthetic value and longevity.
Unlike standard wood planks, parquet tiles are designed with the grains running in different directions to create unique patterns that also help in stabilizing the wood, reducing expansions and contractions due to changes in humidity.
Signs it’s Time for Sanding and Restoration
As beautiful as it is, parquet flooring undergoes wear and tear and can show signs of ageing and damage. It is critical for the maintenance of the floor’s aesthetics and durability to recognise when it needs sanding or complete restoration. Telltale signs include scruffs, scratches, and a dulled finish that diminishes the floor’s shine.
More severe signs like loose blocks, creaks when walked over, or visible discolouration also indicate the need for thorough sanding and possible replacement of some pieces.
Preparing for the Sanding Process
Assessing the Floor and Gathering Tools
Before proceeding with sanding, a thorough inspection of the parquet flooring is essential. Look for any loose, damaged, or missing blocks. Identify if there are protruding nails or deep scratches that need attention. Gather the necessary tools and materials for the sanding process. Essential tools include a drum or orbital sander, an edge sander or handheld sander, sandpaper of various grits, and a reliable vacuum cleaner.
Additionally, preparation of safety gear is crucial; ensure you have a dust mask, ear protection, and safety goggles.
Room and Floor Preparation Techniques
Start by completely clearing the room of furniture, rugs, and any other items to provide unrestricted access to the entire floor. Next, inspect and repair any noticeable damage. This may involve fixing loose or lifted blocks and countersinking any raised nails to prevent damage to the sanding equipment.
Secure your workspace by sealing off doorways and vents with plastic sheeting to confine the dust generated during sanding. Ensure the floor is clean and free from any debris that might impair the sanding process.
How to Sand Parquet Floors?
Beginning with Coarse Grit Sanding
To begin the sanding process, equip your sander with coarse-grit sandpaper, typically 24 or 36 grit. Start sanding the parquet floor by moving the sander consistently across the floor, avoiding excessive pressure and prolonged stops, which can gouge the wood.
Since parquet floors have grains running in various directions due to their geometric designs, it’s essential to sand in a manner that addresses the multiple grain directions without damaging the wood. Despite sometimes going against the grain, focus on achieving an even sanding pattern across the entire floor.
Progressing to Finer Grits for a Smooth Finish
After the initial coarse sanding, thoroughly vacuum the floor to clear all dust and assess the surface. Following this, switch to medium-grit sandpaper (60 or 80 grit), repeat the sanding process to smooth the floor further and prepare it for the final finish.
The last step of sanding involves using fine-grit sandpaper (100 or 120 grit). This final sanding phase is crucial as it ensures a smooth, finish-ready surface. Each change in sandpaper grit makes the surface smoother, which is key for an optimal final appearance.
Detailed Sanding: Corners and Edges
Using Edge Sanders and Handheld Tools
To effectively sand the corners and edges of a parquet floor, use an edge sander or handheld tools. These tools are essential since the larger floor sanders cannot reach into tight spaces along room perimeters or in corners.
Attach the same grit of sandpaper as used on the floor sander to maintain consistency in texture and smoothness. Carefully manoeuvre the edge sander or handheld tool to ensure that these hard-to-reach areas receive the same level of attention as the main floor sections.
Techniques for Avoiding Damage to Parquet Patterns
Parquet patterns are delicate and can be easily damaged if not correctly handled during the sanding process. To preserve the integrity of these patterns, always sand in a direction that aligns with the grain of the wood blocks wherever possible.
For blocks where grain direction varies, a gentle diagonal sanding motion may be necessary. Be particularly cautious to avoid aggressive sanding techniques that might lead to scratches or other damages aligning against the grain. Use finer grit sandpaper for touch-ups and focus on maintaining consistent pressure throughout the sanding process.
This attention to detail will protect the aesthetic and structural integrity of the parquet patterns, ensuring a beautifully restored floor.
Repair and Maintenance Tips
Identifying and Fixing Damaged Blocks
Before proceeding with the sanding of your parquet floor, it’s essential to address any damages. Inspect your floor thoroughly, searching for loose, cracked, or warped blocks. To fix these, you may need to remove the damaged blocks carefully with a chisel, ensuring not to disturb the adjoining blocks.
Once removed, replace them with new blocks of the same size and wood type, securing them in place with wood adhesive. Allow the adhesive to dry completely according to the manufacturer’s instructions before sanding the area to ensure a smooth, even surface.
Filling Gaps and Addressing Loose Blocks
Parquet floors can develop gaps due to changes in humidity and wear. To fill these gaps, mix fine sawdust collected during the initial sanding with a resin or wood filler that matches your floor’s colour. Apply the mixture meticulously into the gaps using a putty knife, wiping away any excess filler immediately.
For loose blocks, apply wood glue beneath them and press down firmly. Weigh them down with a heavy object until the glue sets to ensure they are securely attached to the subfloor.
Applying the Finish
Choosing the Right Finish: Oil, Wax, or Varnish
Choosing the right finish for your parquet floor depends on the desired aesthetic and the level of durability required.
Oils penetrate deep into the wood, enhancing its natural grain and offering easy spot repairs but requiring more frequent maintenance. Waxes provide a low-sheen, natural finish that is quite easy to apply but may not be as durable as other finishes. Varnishes, on the other hand, create a hard, protective layer over the wood that is highly resistant to scratches and spills, making it ideal for high-traffic areas.
Consider the usage of the room and personal preference when selecting your finish.
Application Techniques for Even Coverage
For even coverage and best results, apply the chosen finish following the wood grain. Start by ensuring your parquet floor is clean and completely free of dust. Use a high-quality brush or roller designed for the type of finish you’re using. Apply the finish in thin, even coats, spreading it smoothly to avoid bubbles and streaks. For oils and waxes, you might also consider using a buffing machine for a polished outcome.
Allow each layer to dry thoroughly, as recommended by the finish manufacturer, before applying the next coating. Generally, two to three coats are sufficient to achieve a durable, attractive finish.
Always follow the specific instructions provided by the finish manufacturer for the best results, and allow the final coat to cure for the recommended time before moving furniture back into the room or allowing heavy foot traffic.
Post-Sanding Cleanup and Maintenance
Efficient Cleaning Techniques Post-Sanding
After sanding your parquet floor, it’s essential to clean up thoroughly to ensure no sanding dust remains, as it could affect the finish. Begin by vacuuming the floor meticulously using a brush attachment to remove most of the dust. It is important to vacuum multiple times, each time checking corners and edges where dust can accumulate.
Following vacuuming, use a slightly damp microfiber mop or cloth to wipe the floor. This helps pick up any residual dust that the vacuum may have missed. Be sure the cloth is only slightly damp, as excessive water can damage wood floors. This step is crucial before moving on to applying any finishes, as dust remnants can hinder the effectiveness of these products and the overall quality of the floor’s appearance.
Regular Maintenance to Prolong Floor Beauty and Durability
Maintaining your newly sanded parquet floor involves regular care to ensure its longevity and continued beauty. Here are some tips to help you maintain your parquet floors:
- Regular Cleaning: Sweep or vacuum your floors weekly. Use a soft-bristled broom or a vacuum cleaner with a setting for hardwood floors to avoid scratching the surface.
- Immediate Spill Cleanup: Clean spills immediately with a dry or slightly damp cloth to prevent watermarks or potential warping.
- Use Protective Pads: Place felt pads under furniture legs to protect the floor from scratches and dents from heavy furniture.
- Avoid Harsh Cleaners: Stick to cleaners that are specifically meant for hardwood floors. Avoid using abrasive or ammonia-based cleaners as they can strip the finish and damage the wood.
- Polishing and Recoating: Depending on the level of traffic, consider polishing the floors every few months to maintain the sheen. Recoat with varnish or another suitable finish every few years to renew its protective layer.
By adhering to these maintenance steps, your parquet floor will continue adding warmth and elegance to your home for many years. Regular upkeep not only enhances the appearance but also significantly contributes to the longevity and durability of your flooring.
Conclusion
Sanding parquet floors is a satisfying journey that not only transforms your living space but also preserves a piece of history beneath your feet. With careful execution and a bit of patience, even beginners can bring out the inherent beauty and durability of parquet flooring, ensuring it continues to add warmth and character to your home.
Remember, each floor has its story and unique characteristics. As you start this project, embrace the process, knowing that you’re not just repairing a floor but restoring an art form.
And if you need professional assistance, you can count on Total Floor Sanding And Polishing. We are the leading floor sanders Melbourne locals have trusted for years. With our state-of-the-art equipment and unparalleled sanding expertise, you can ensure the best results for your parquet floors. Contact our team today and let us exceed your expectations!

